|
|
|
|
|
 |
VPN Client Connection For Windows Vista
The installation procedure assumes that you have the following:
- You have installed and configured the VPN connection. If you have not, please follow the instructions here.
- You have read and agreed with the Usage Restrictions for the VPN service.
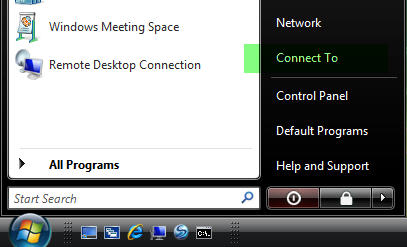
1. Open the Start Menu and select the Connect To option.
2. From the Connect to a network window, click the Silverland VPN connection and click Connect.

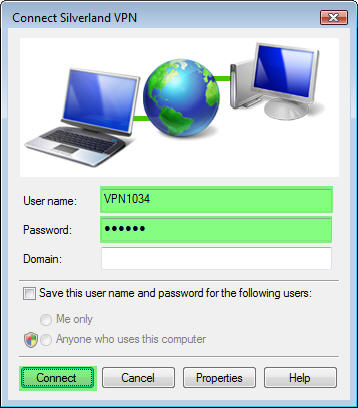
3. Fill-in your User name and Password and click Connect.
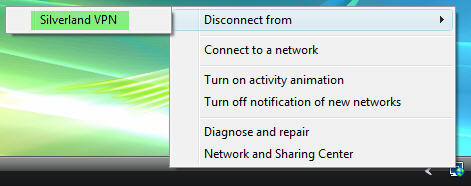
To disconnect from our VPN service at any time simply Right Click on the network icon in the taskbar and choose the Disconnect from option and click Silverland VPN.
Troubleshooting / FAQ:
We have gathered a list of known issues and problems associated with the VPN
alternatively you can e-mail our Support Desk
|
|
|
|
|
|
|
|
|
|
|
|
|
|
|