|
|
|
|
|
 |
VPN Client Installation For Windows 7 (Automatic Install)
The installation procedure assumes that you have the following:
- You are connected to the Internet via an Ethernet adapter or have a supported modem installed.
- TCP/IP is installed.
- You have an account with an Internet Service Provider (ISP).
- You have read and agreed with the Usage Restrictions for the VPN service.
1. Log on to your Windows 7 computer as Administrator or a user with administrator privileges.
2. Download our VPN installation package version 1.0 and run it. Due to Windows Vista's security settings, it may warn you that the publisher could not be verified and if you are sure you want to run this software. Click Run.

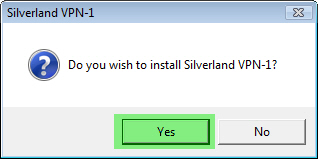
3. When asked if wish to install Silverland VPN, click Yes.
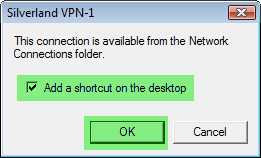
4. You will be notified that this connection is available from the Network Connections folder. Check the "Add a shortcut on the desktop" option and click OK. A VPN connection shortcut will be added to your desktop.
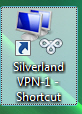
5. Double-Click the "Silverland VPN-1 Shortcut" found on your desktop.
6. Fill-in your User name and Password.
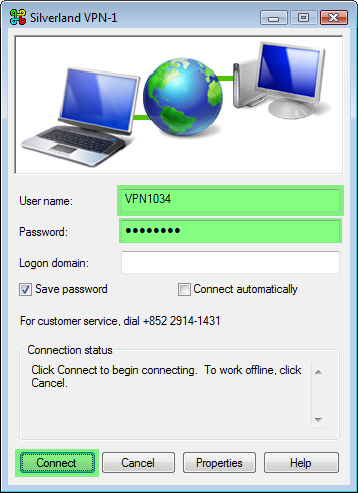
Note: If you are using your own computer and wish to save the user name and password for subsequent connections, check Save password. However, if you are using a public computer, we STRONGLY advise you NOT to check this option as other users will be able to gain access to your VPN account.
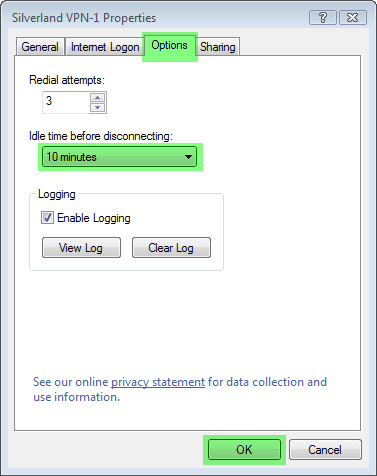
7. By default, your VPN connection is set to disconnect when it is idle for 10 minutes. If you wish to change this setting, click Properties and select the Options tab and select the number of idle minutes before disconnecting and click OK to save this setting. Now click Connect.
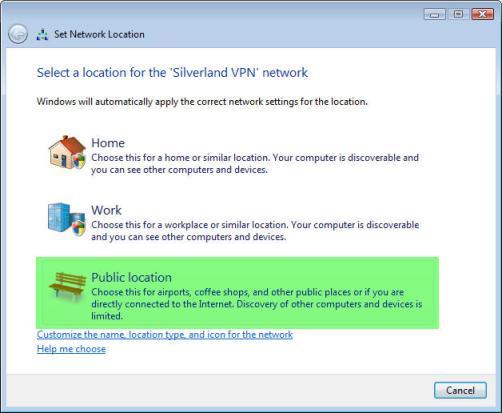
8. For a first time connection, Windows Vista will ask you to select your network location. Since you do not need to access other resources on our network, choose Public location by clicking on it.
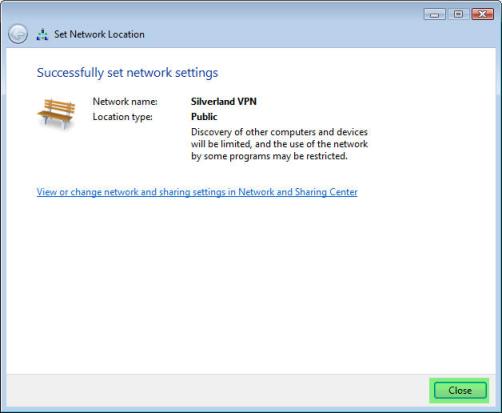
9. Once set, a window will pop up telling you that Windows Vista has successfully set the network settings. Click Close.
To disconnect from our VPN service at any time simply Click on the network icon in the taskbar, click Silverland VPN and click and click Disconnect.

To re-connect to our VPN service, Double-Click the Silverland VPN Shortcut that the installation package placed on your desktop, fill-in your User name and Password if it isn't saved and click Connect.
Troubleshooting / FAQ:
We have gathered a list of known issues and problems associated with the VPN
alternatively you can e-mail our Support Desk
Click here to obtain a PDF version of this documentation.
|
|
|
|
|
|
|
|
|
|
|
|
|
|
|