VPN Client Installation For Mac OS X (Manual Install)
The installation procedure assumes that you have the following:
- You are connected to the Internet via an Ethernet adapter or have a supported modem installed.
- TCP/IP is installed.
- You have an account with an Internet Service Provider (ISP).
- You have read and agreed with the Usage Restrictions for the VPN service.
1. Log on to your Mac OS X computer with administrator privileges.
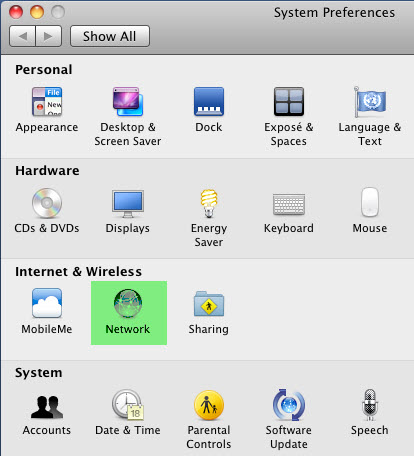
2. Open the System Preferences by going to the Apple menu and choosing "System Preferences" or choose "System Preferences" from the Dock.

3. Once System Preference is open click on the Network icon.
4. In the Network window, click on the + icon located near the bottom right corner to make a new setting for the VPN connection.
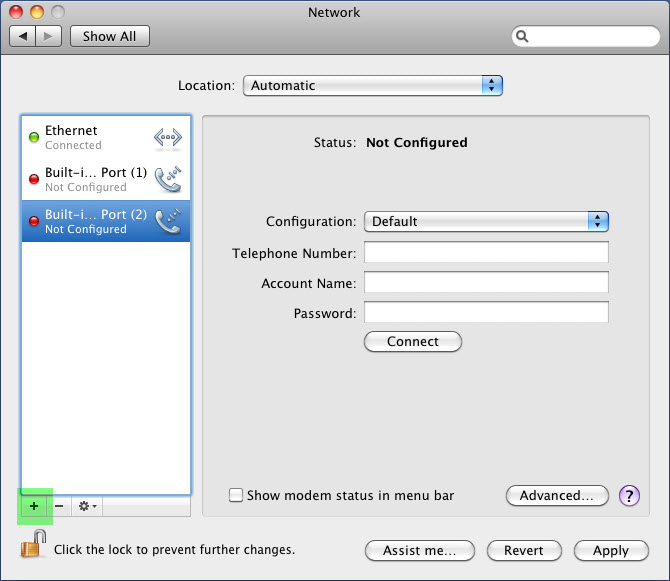
5. When you click on the + icon, a new service sheet appears.
a. Click on the Interface popup menu to see a list of choices and select VPN.
b. Click on the VPN Type popup menu to see a list of chocies and select PPTP.
c. Enter Silverland VPN for the Service Name.
d. Click Create to create a VPN connection setting.

6. Now that you have a VPN connection setting, you'll need to make a Configuration for it. Click the Configuration popup menu and select Add Configuration...
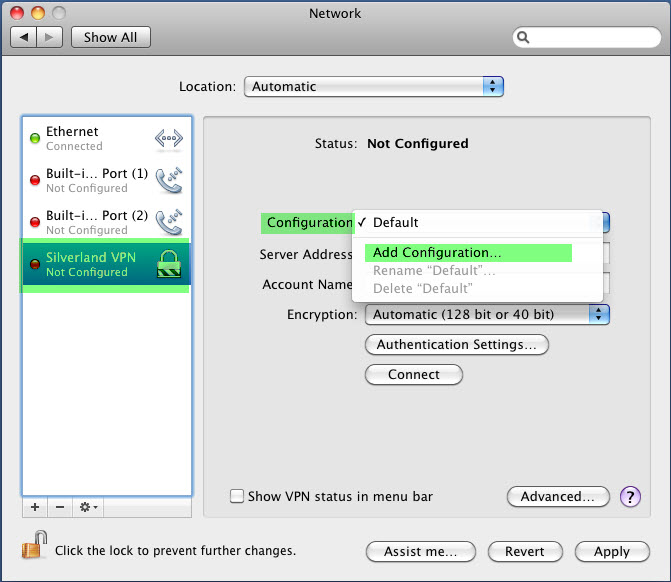
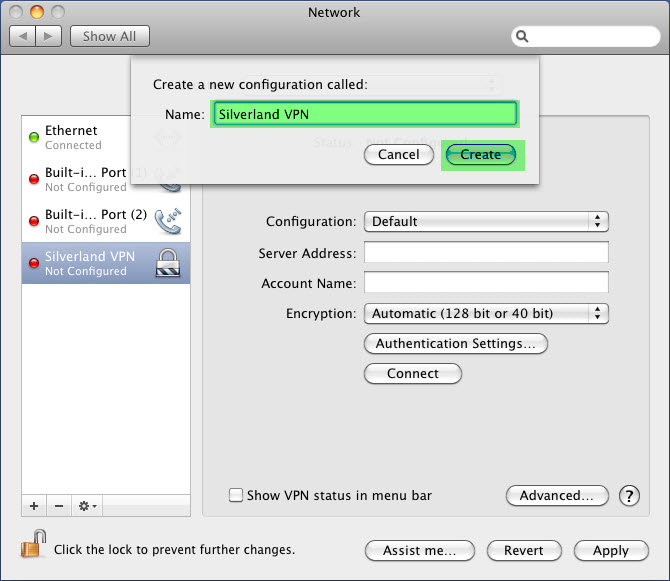
7. In the next screen, enter Silverland VPN for the configuration name then click Create.
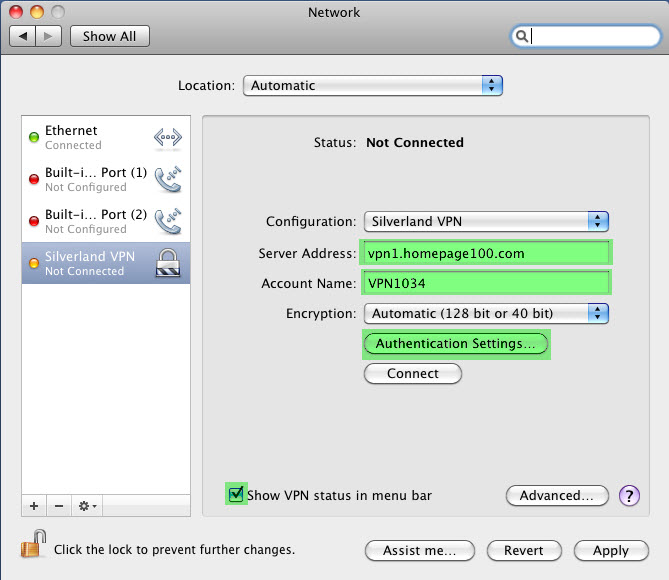
8. Now that we have created the configuration, we can start entering your VPN information.
a. For Server Address enter vpn1.homepage100.com
b. For Account Name, enter your assigned VPN User Name
c. Make sure "Show VPN status in menu bar" is checked.
d. Click the Authentication Settings... button to enter your password.
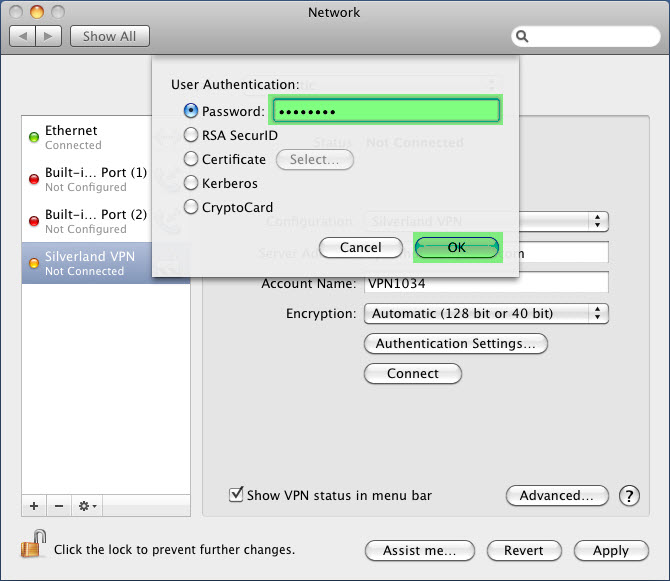
9. In the User Authentication sheet, enter your assigned VPN Password and click OK.
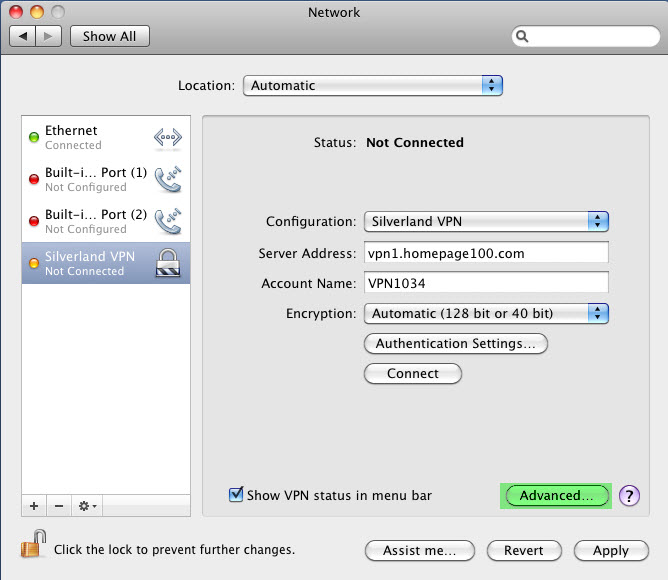
10. Next we will need to adjust some of the advanced VPN settings. To do that, first click the Advanced... button.
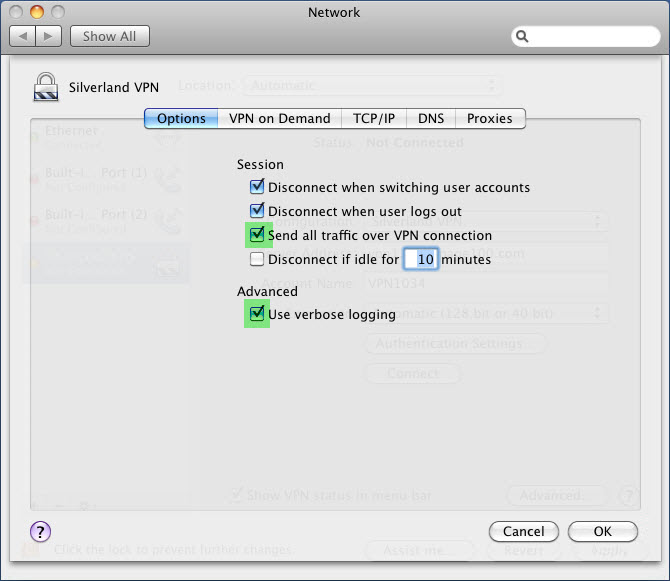
11. For the VPN to work effectively, the "Send all traffic over VPN connection" checkbox should be checked. Optionally, check the "Use verbose logging" option which will make it easier to see what's happening if you are having connection problems.
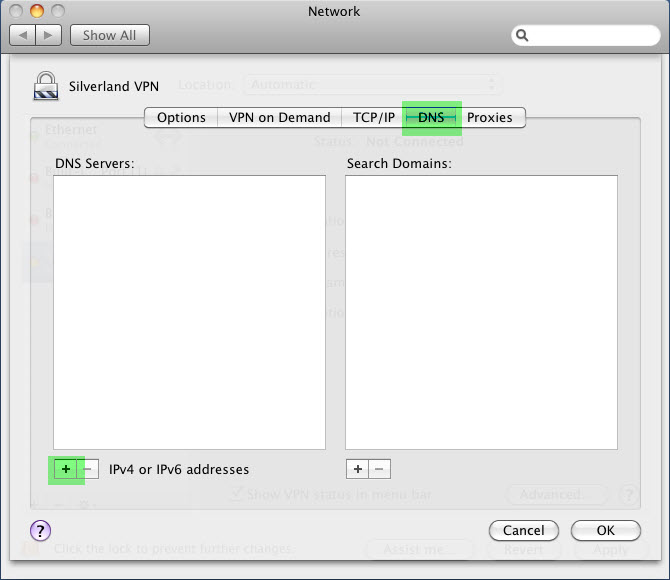
12. Next click the DNS tab and click the + icon to enter a few DNS server IP addresses.
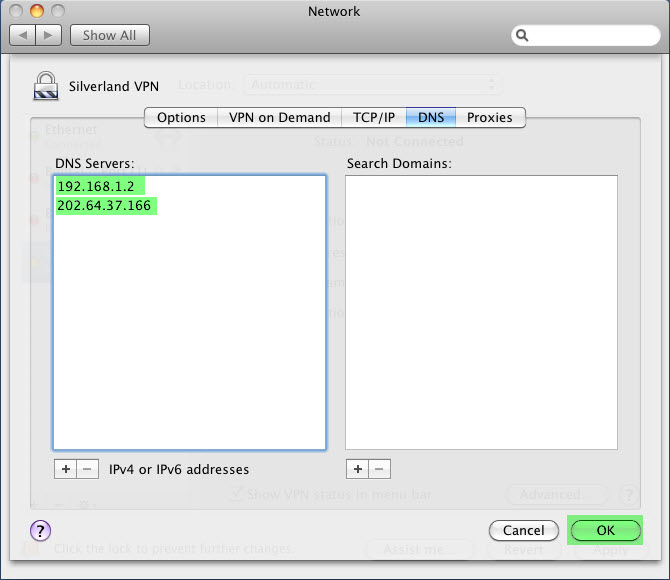
13. After entering the DNS server IP addresses (192.168.1.2 & 202.64.37.166) click the OK button.
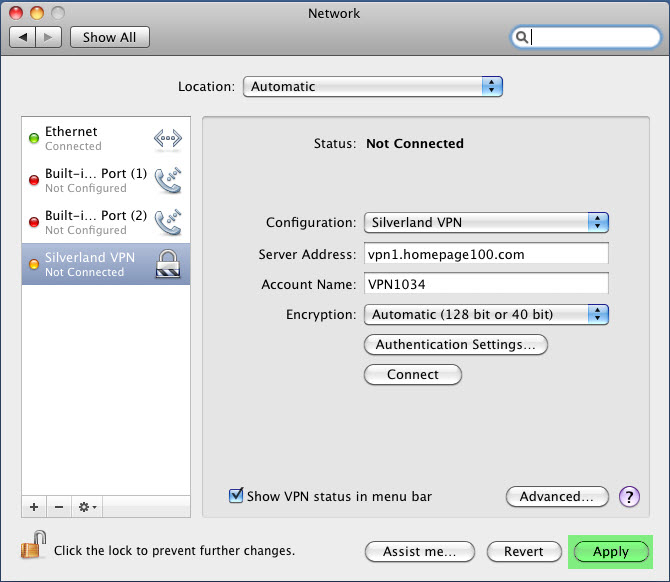
14. You are now back to the Network window. Click the Apply button to save the changes
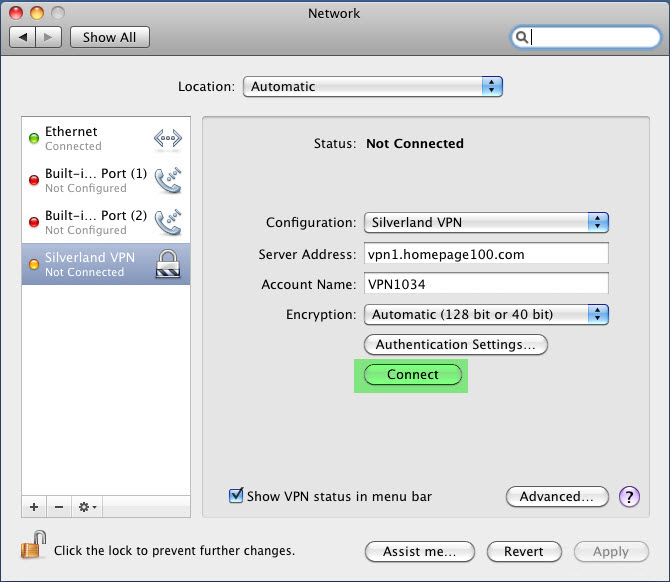
15. You are now ready connect to the VPN server for the first time. Click the Connect button to connect.
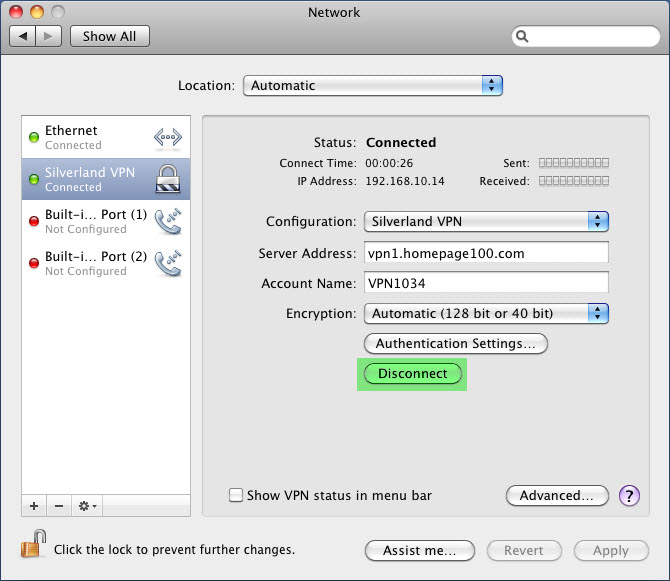
Once connected, the Status will change from Not Connected to Connect and below it will show you additional information as well.
Note that the above procedures are only necessary for creating and configuring a VPN connection. For subsequent VPN connections, all you have to do is call up the Network window, choose Silverland VPN from the list on the left side of the window and click the Connect button to connect to our VPN server.
To disconnect from our VPN server at any time simply Click on the Disconnect button in the Network window.
Troubleshooting / FAQ:
We have gathered a list of known issues and problems associated with the VPN
alternatively you can e-mail our Support Desk
Click here to obtain a PDF version of this documentation. |